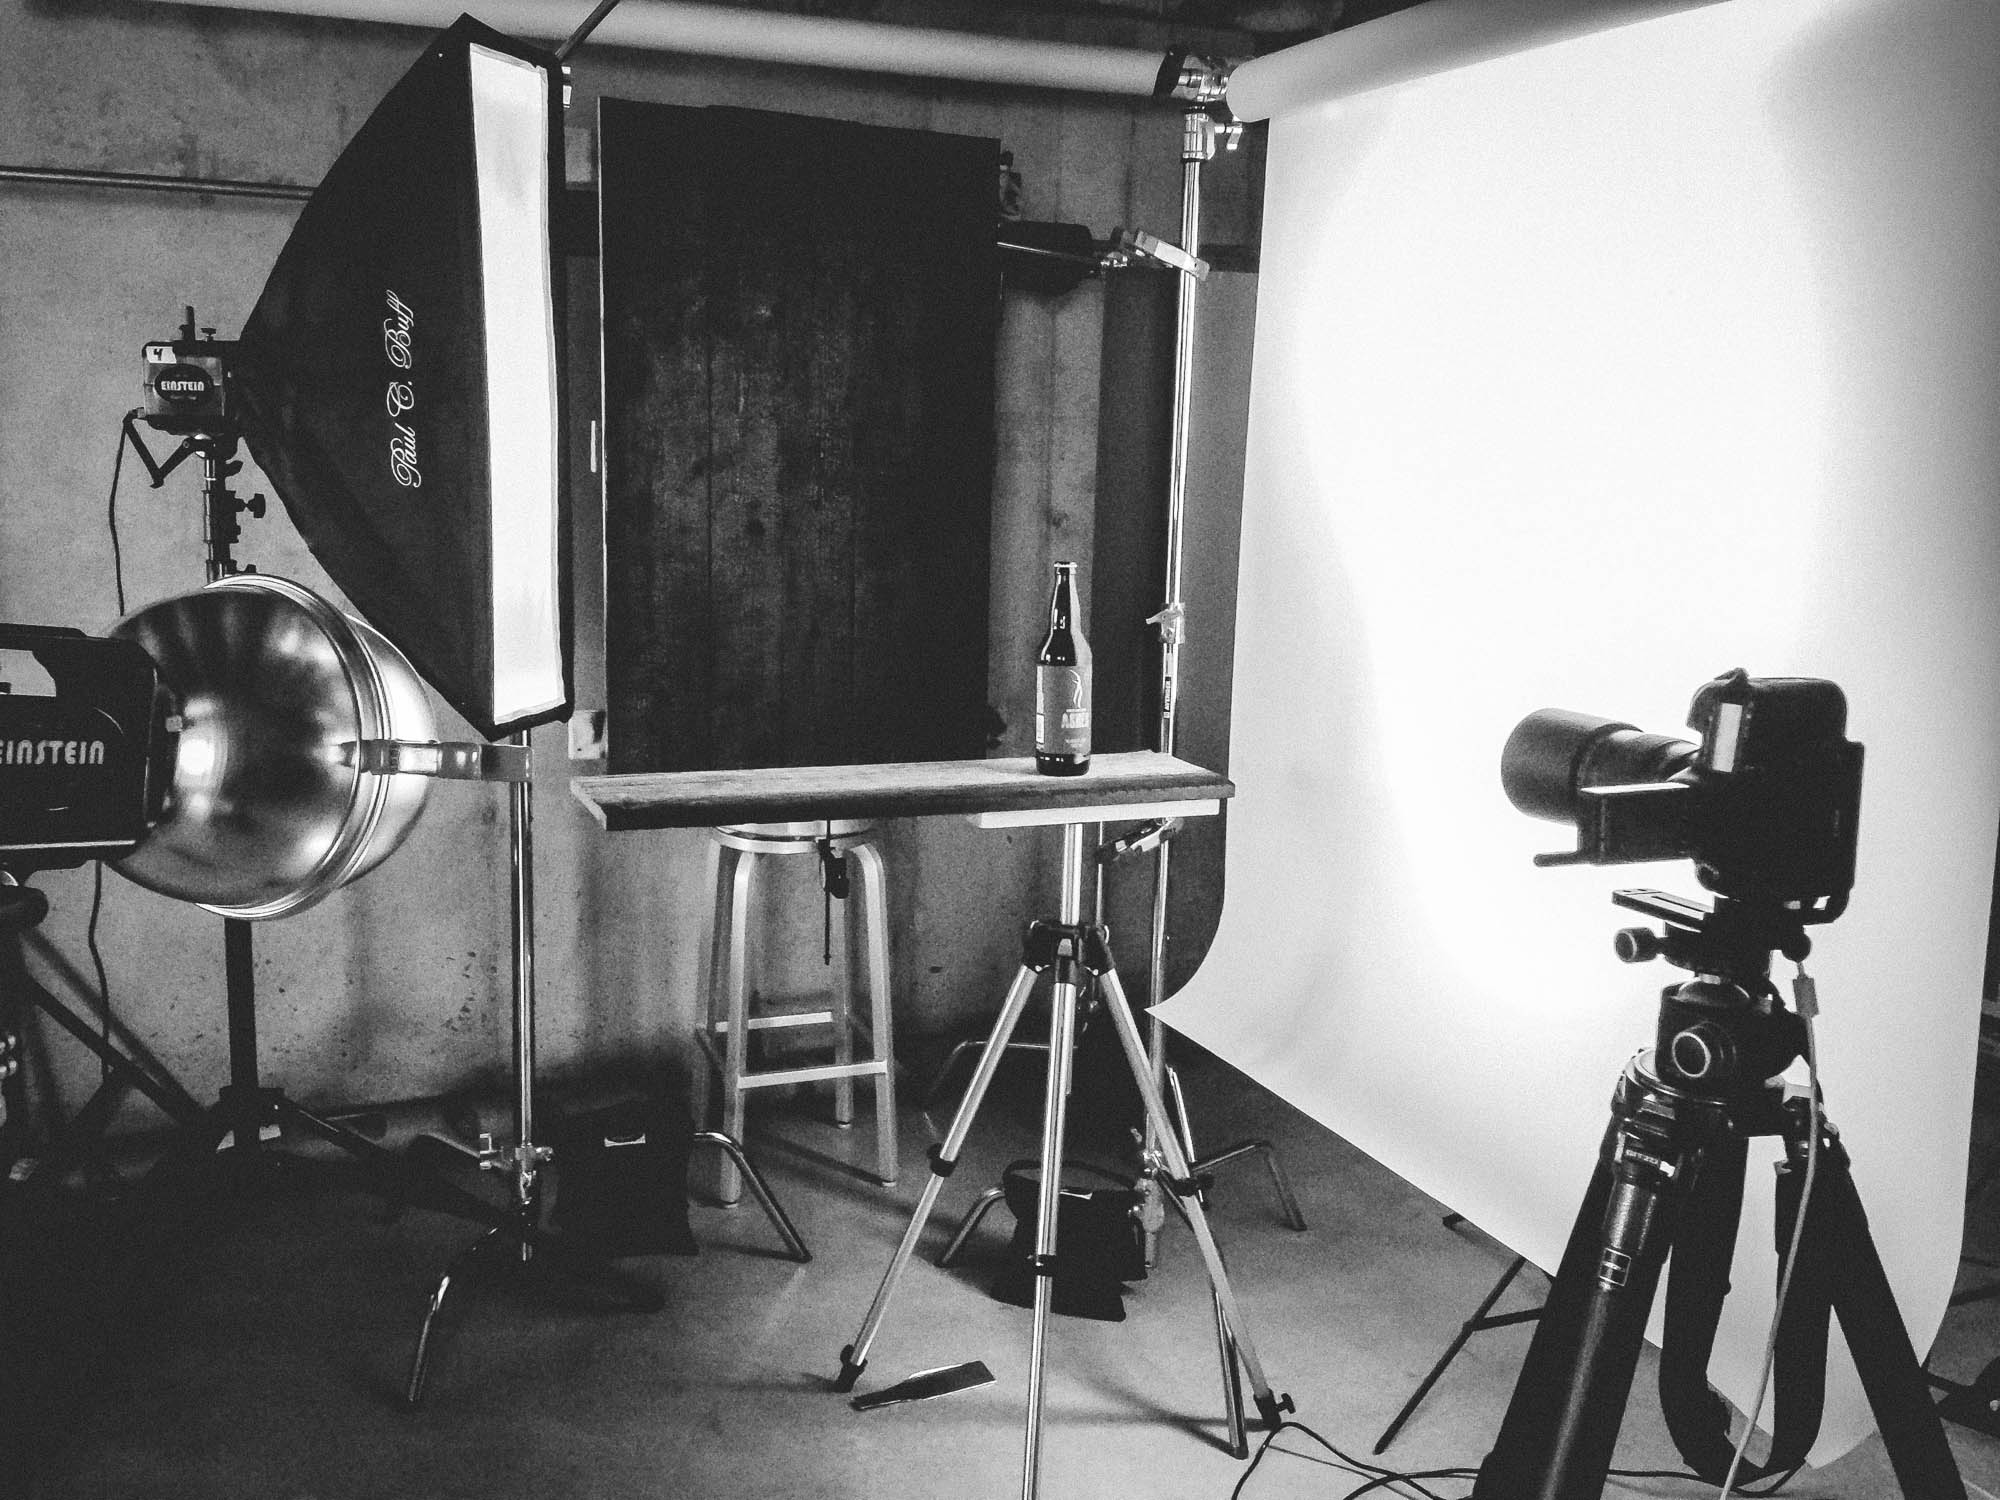
Here’s a behind-the-scenes look at how I created the Fort Collins Brewery – Out of the Ashes beer image.
This image was created both as a portfolio piece and as a tool for me to experiment with lighting and retouching techniques. As is typically the case with my perfectionist mentality, there are a few things I would have done differently in hindsight. But that was really the point of this shoot, to experiment. I shot several different variations of the setup with and without the pepper and lime, and a beer glass. The final image is a composite of five different photos, lit with four strobes, and one burned wood background. Here’s how I did it…
THE BACKGROUND
In my pre-shoot concept, I envisioned the background to play a much larger part in the final image than it ended up. The concept was to have this beautiful moody, silky, textured, charred wood background. It was going to have all these neat textures and really play into the whole “out of the ashes” vibe. Once I got shooting, the reality was that the background needed be offset from the bottle by several feet to keep too much light from spilling onto it. That distance caused the charred wood to go completely out of focus. This wasn’t ideal, so I figured I would just comp an in-focus shot of the background in later. After experimenting with this, it turns out that the in-focus background compressed the overall scene too much and the texture became a distraction. So the background stayed as shot in the final image.
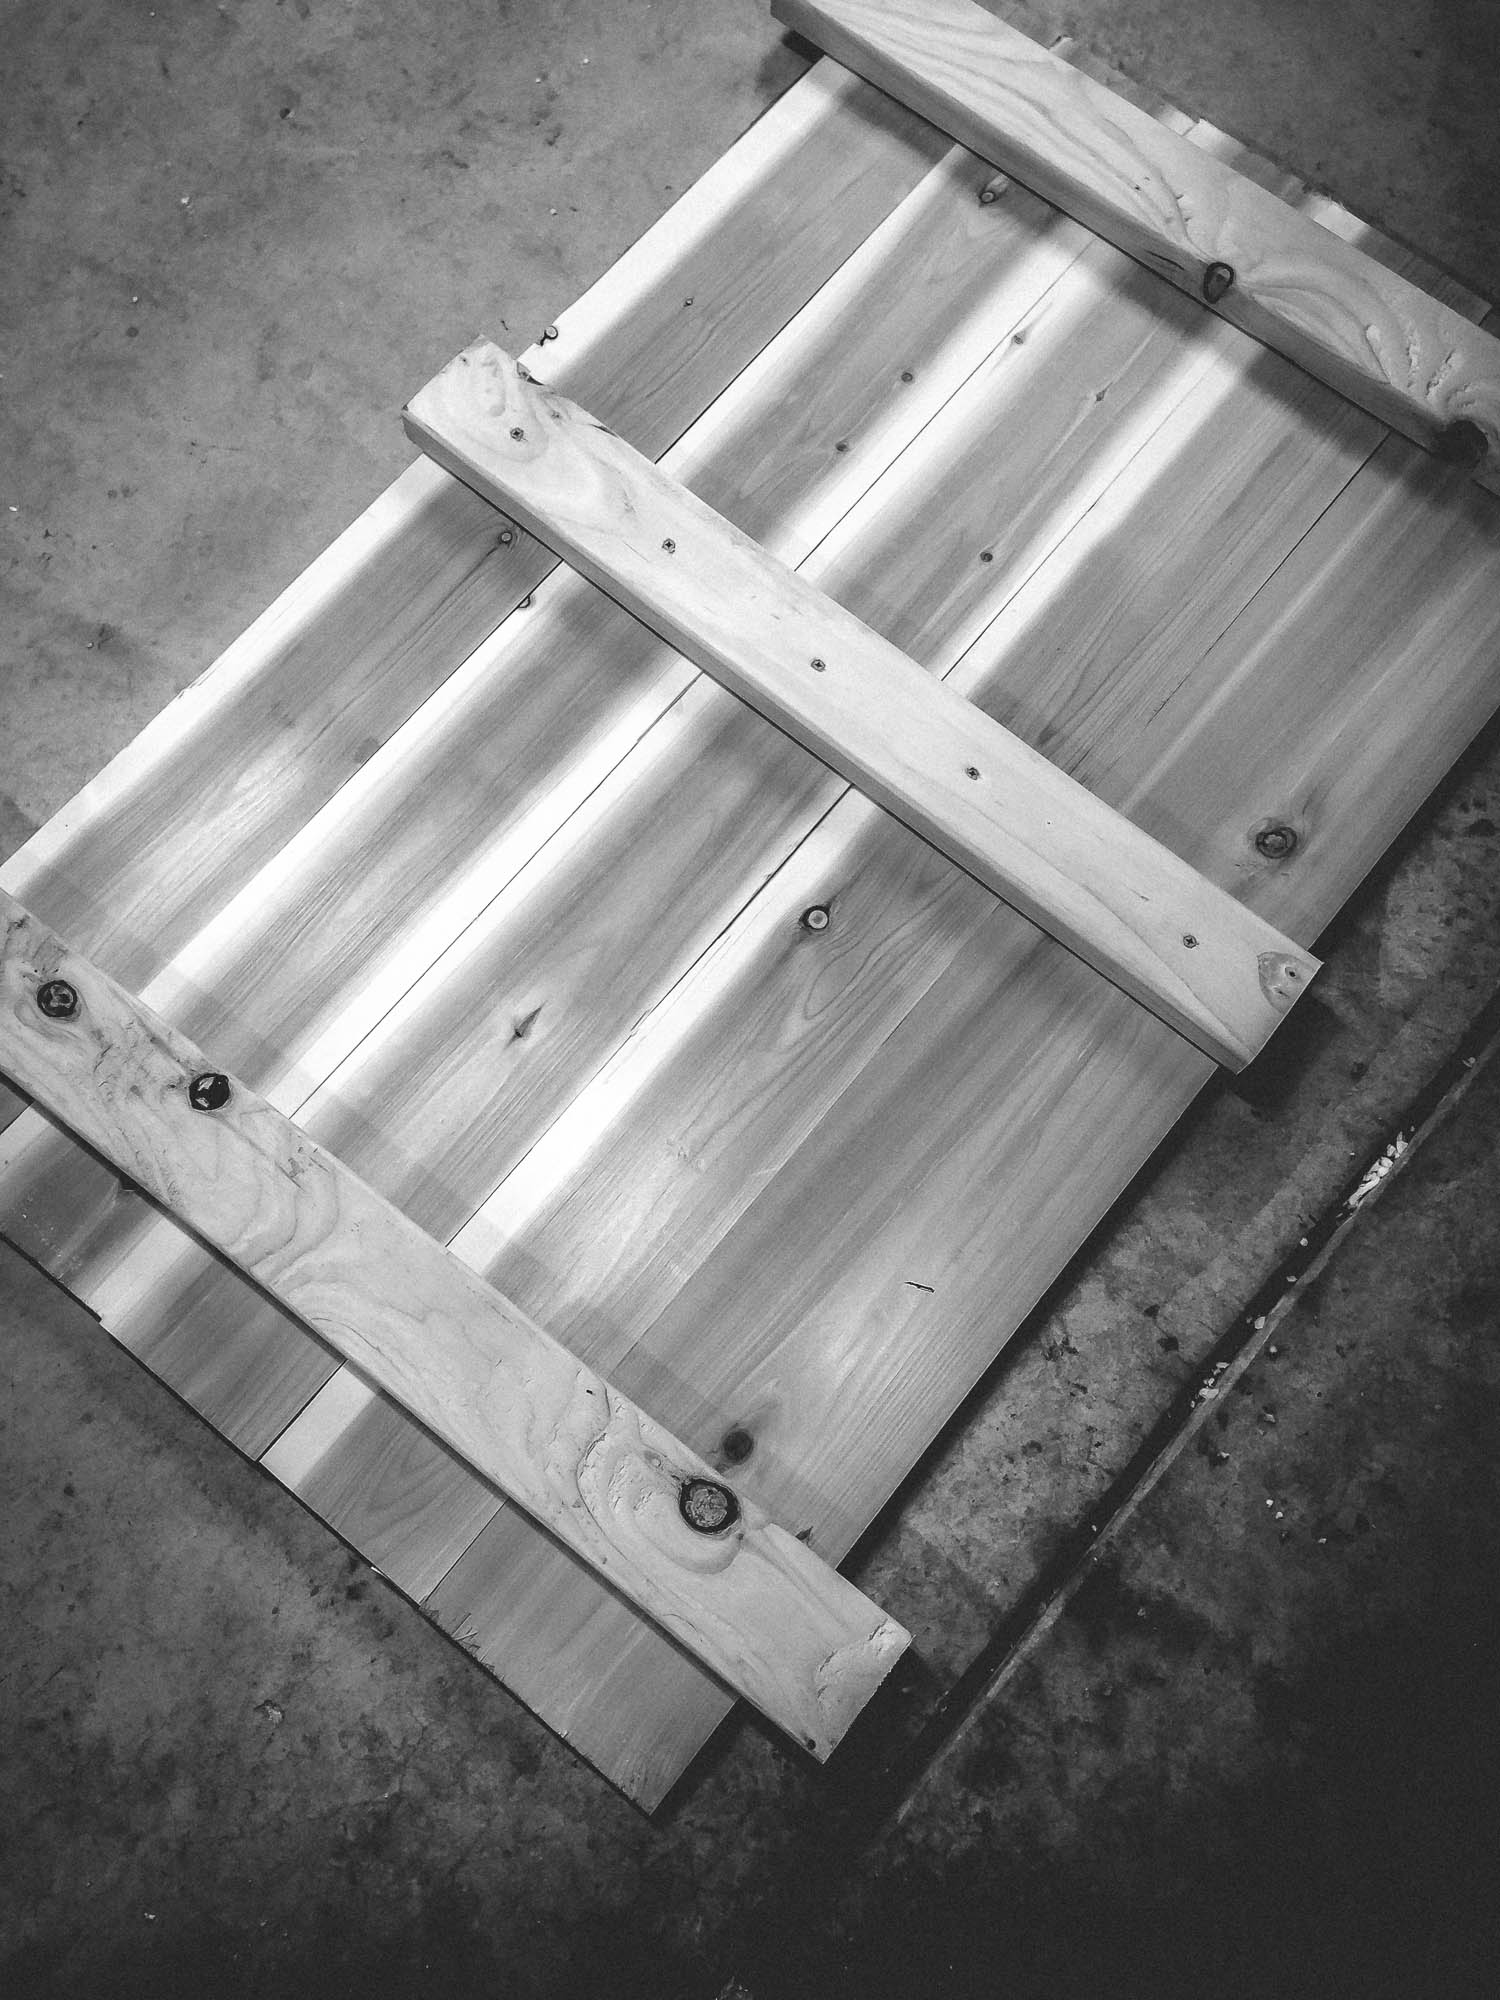
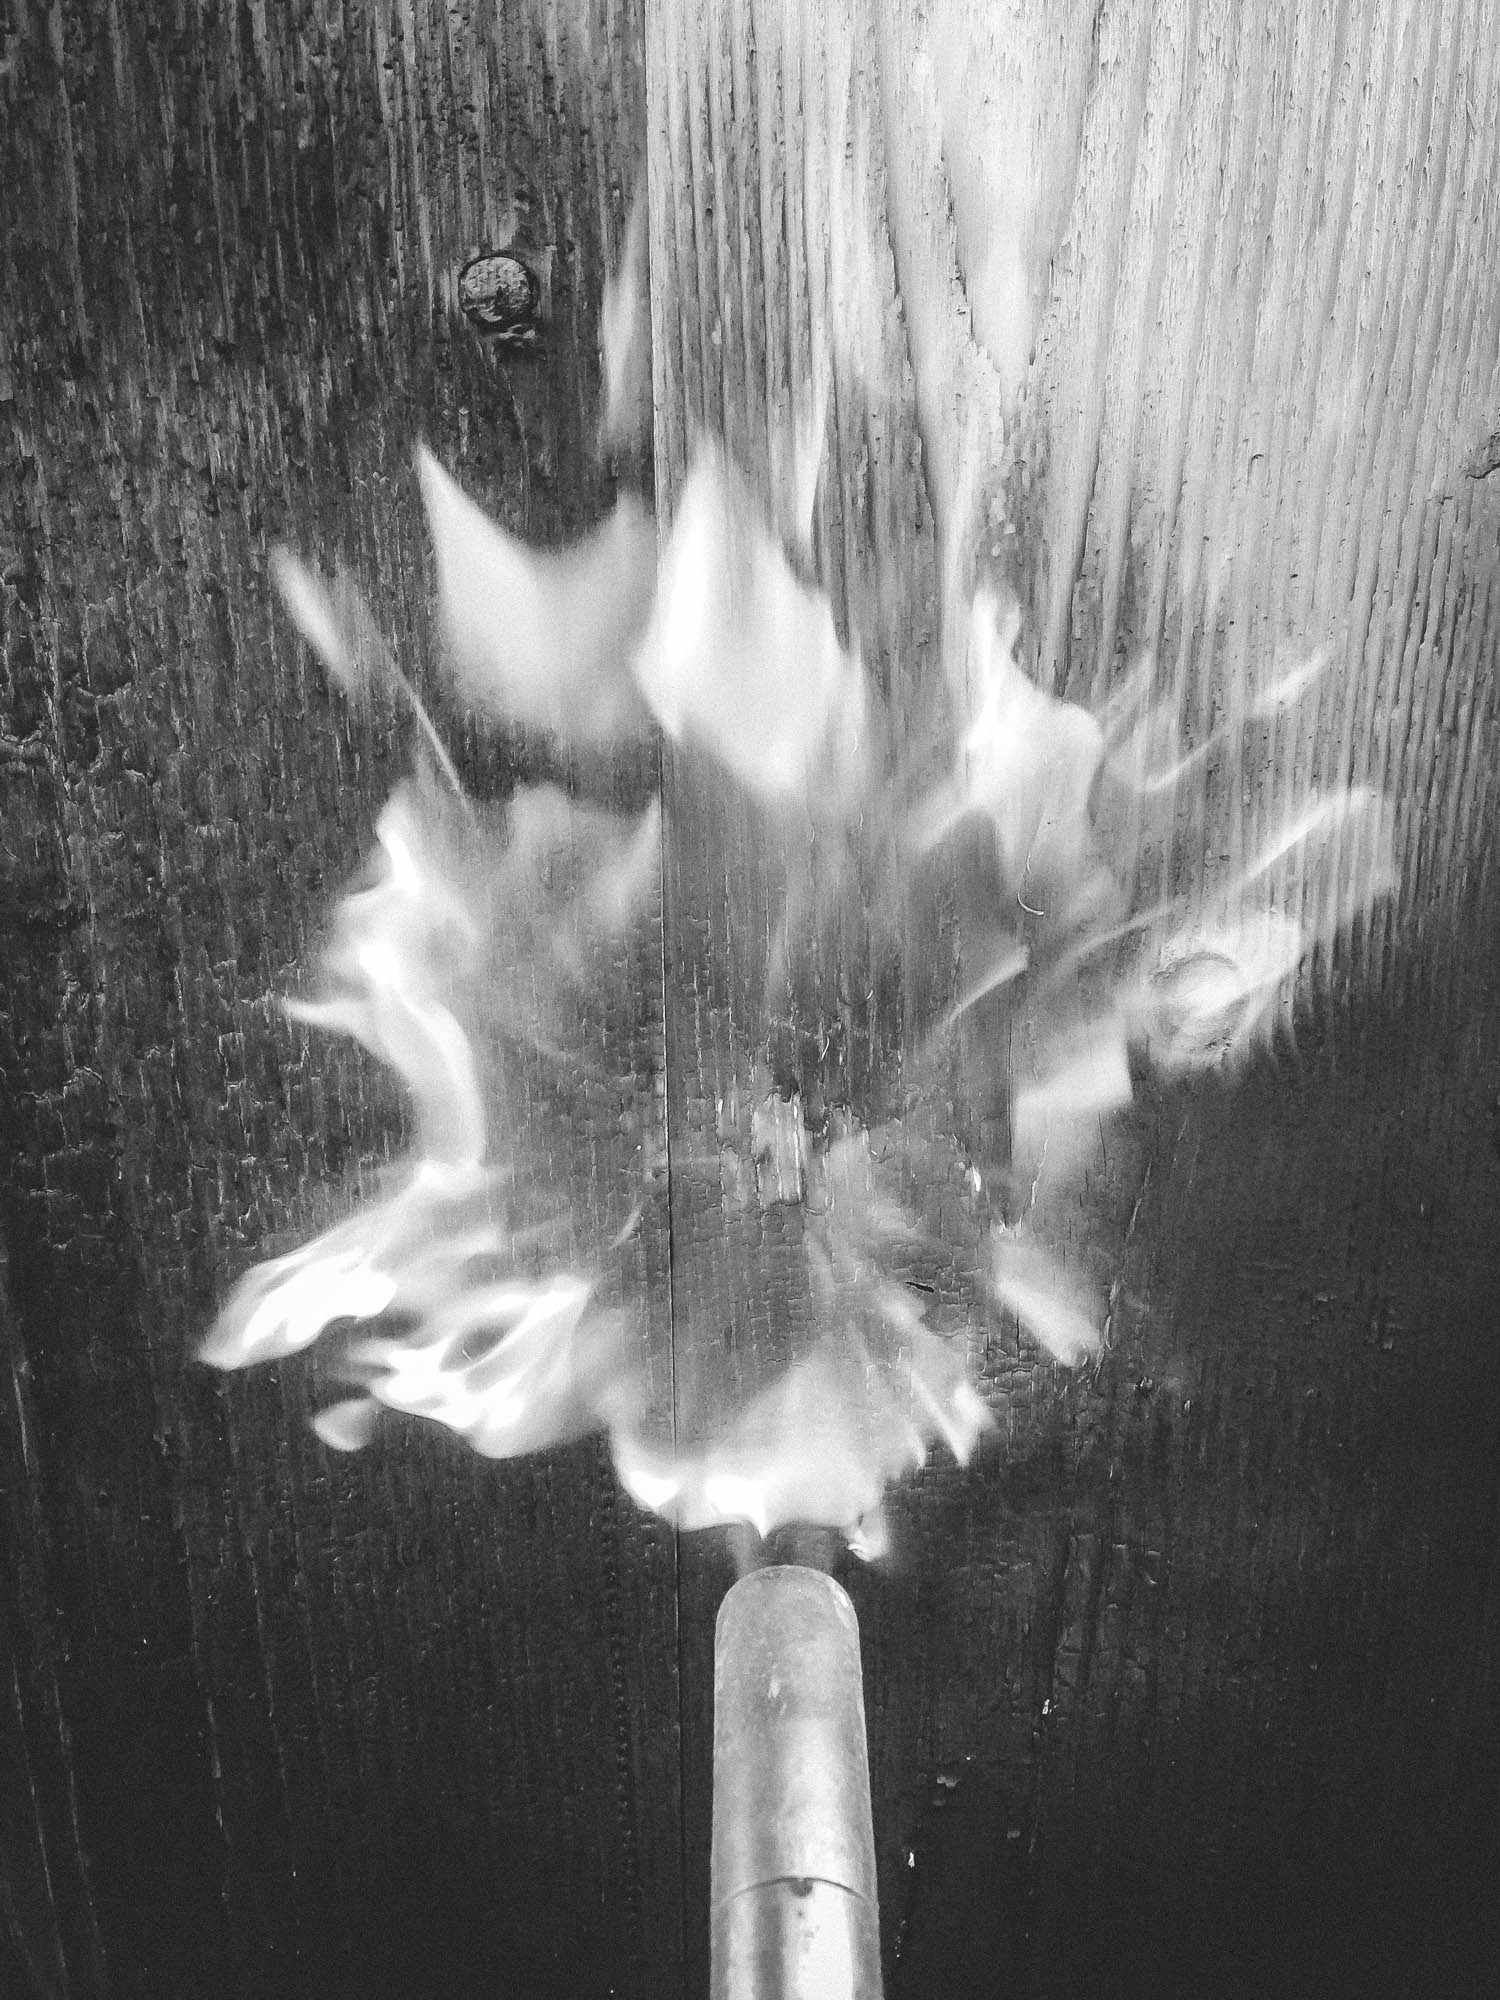
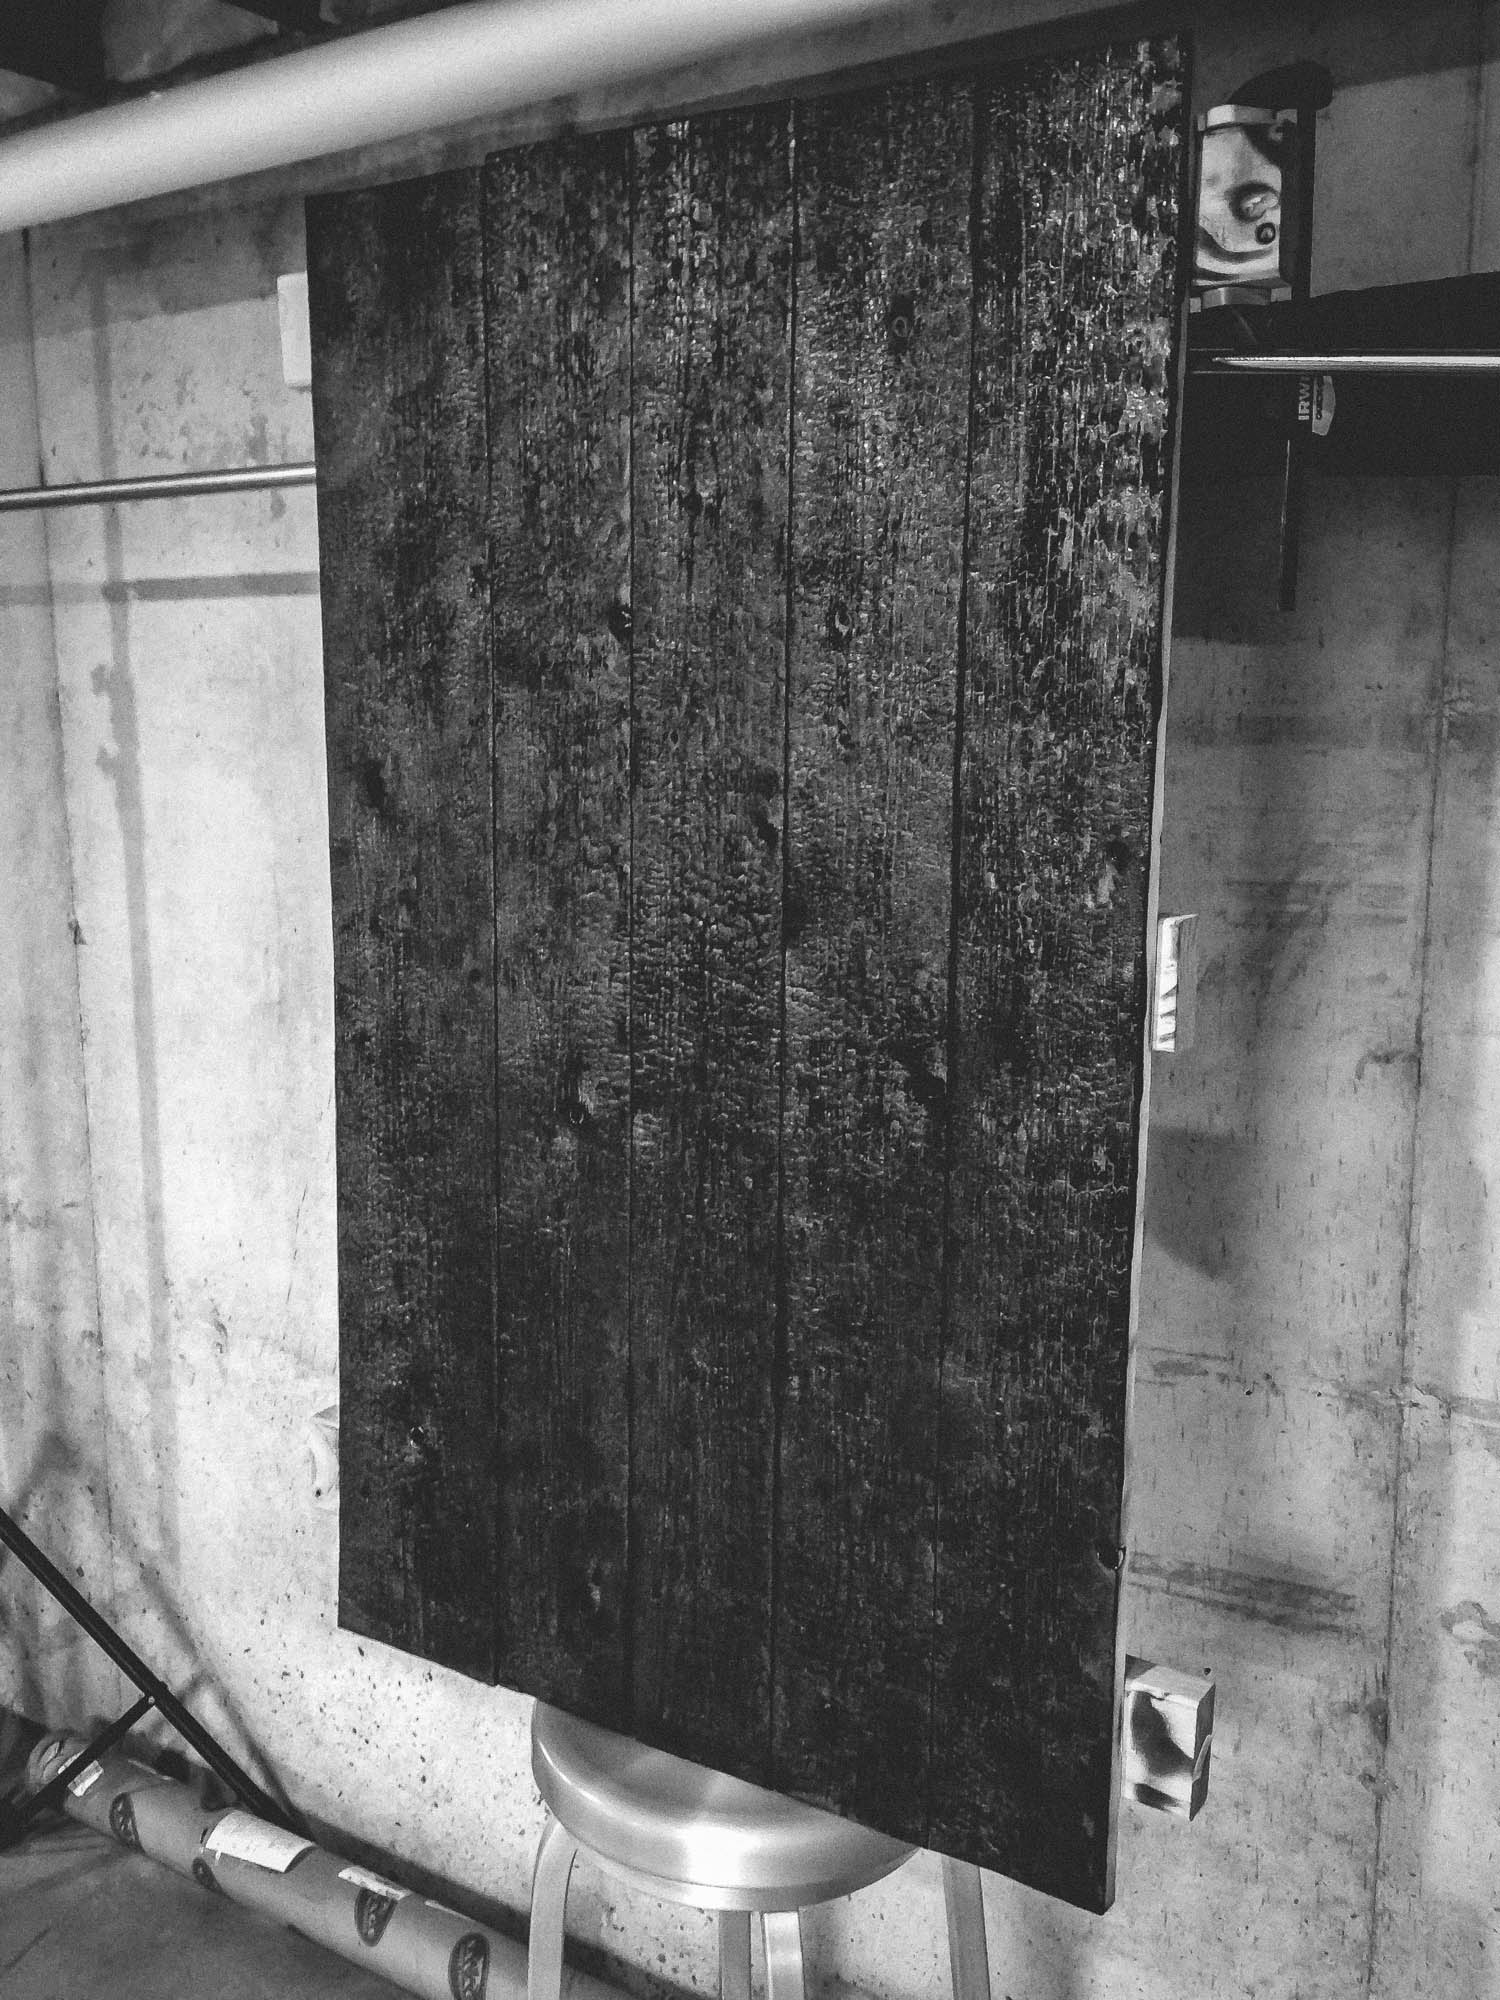
The background is built from cedar boards screwed to 2×4’s across the back to hold it all together. Then I used a blow torch and charred the surface. It was harder than I anticipated getting an even patina and burn pattern across that large of a surface with such a small heat source. I propped the now charred background on a stool and held it upright with a grip arm on a C-stand. Using my DIY tripod table surface, I set the beer bottle on a piece of barn wood that I had also burned the front edge of.
LIGHTING
Lighting was accomplished with four Paul C. Buff Einstein strobes, 2 strip boxes, a beauty dish, and a rigged snoot/grid combo.
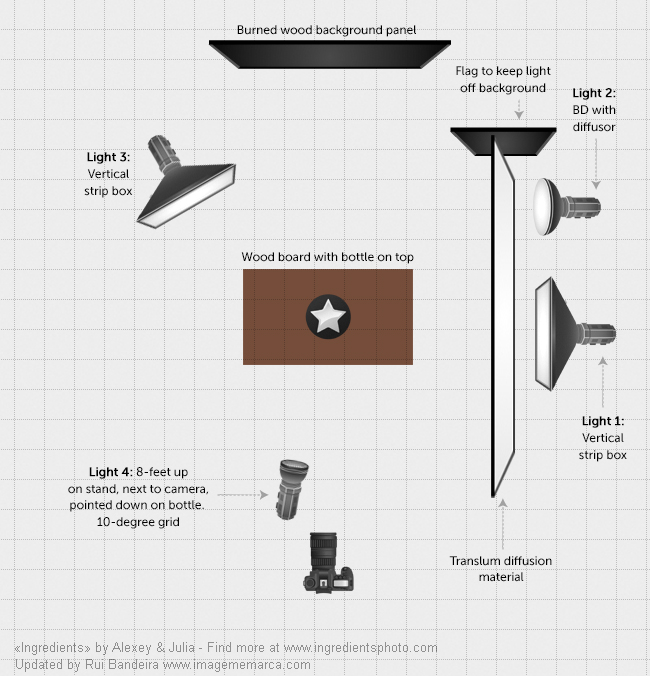
Light 1 & 2: I stuck a roll of Translum diffusion material on a grip arm so that the roll was horizontal and unrolled about 4 feet of it. Then I placed a vertically-oriented strip box behind the Translum, about even with the right side of the bottle (perpendicular to the camera). This was my main light. Then I used a beauty dish next to the strip box (also pointing perpendicular to the camera). The BD provided some fill behind the bottle. I clipped a flag to one of the C-stands to keep the light from the BD and strip from spilling too much onto the charred background. This is one of the areas I would do differently next time. I had my main strip box light positioned too far forward, and with too much light. It created too strong of a highlight on the right side of the bottle that had to be fixed in post. Next time, I’ll dial back the strip, move it further back, and then move the BD to light the front of the bottle.
Light 3: This is another vertical strip box, positioned behind/left of the bottle to create a slight highlight on the left edge of the bottle.
Light 4: This light moved around several times as a I experimented. In the BTS photo above, I had Light 4 down level with the bottle, lighting the left/front of the bottle. For the final shot, I ended up raising this light to the ceiling and moving it closer to the camera, pointing down on the bottle. The BTS photo does show my rigged snoot though. I had a 15-degree grid in the reflector, but it wasn’t tight enough, so I clamped another reflector on the front, in reverse. Worked great!
SMOKE
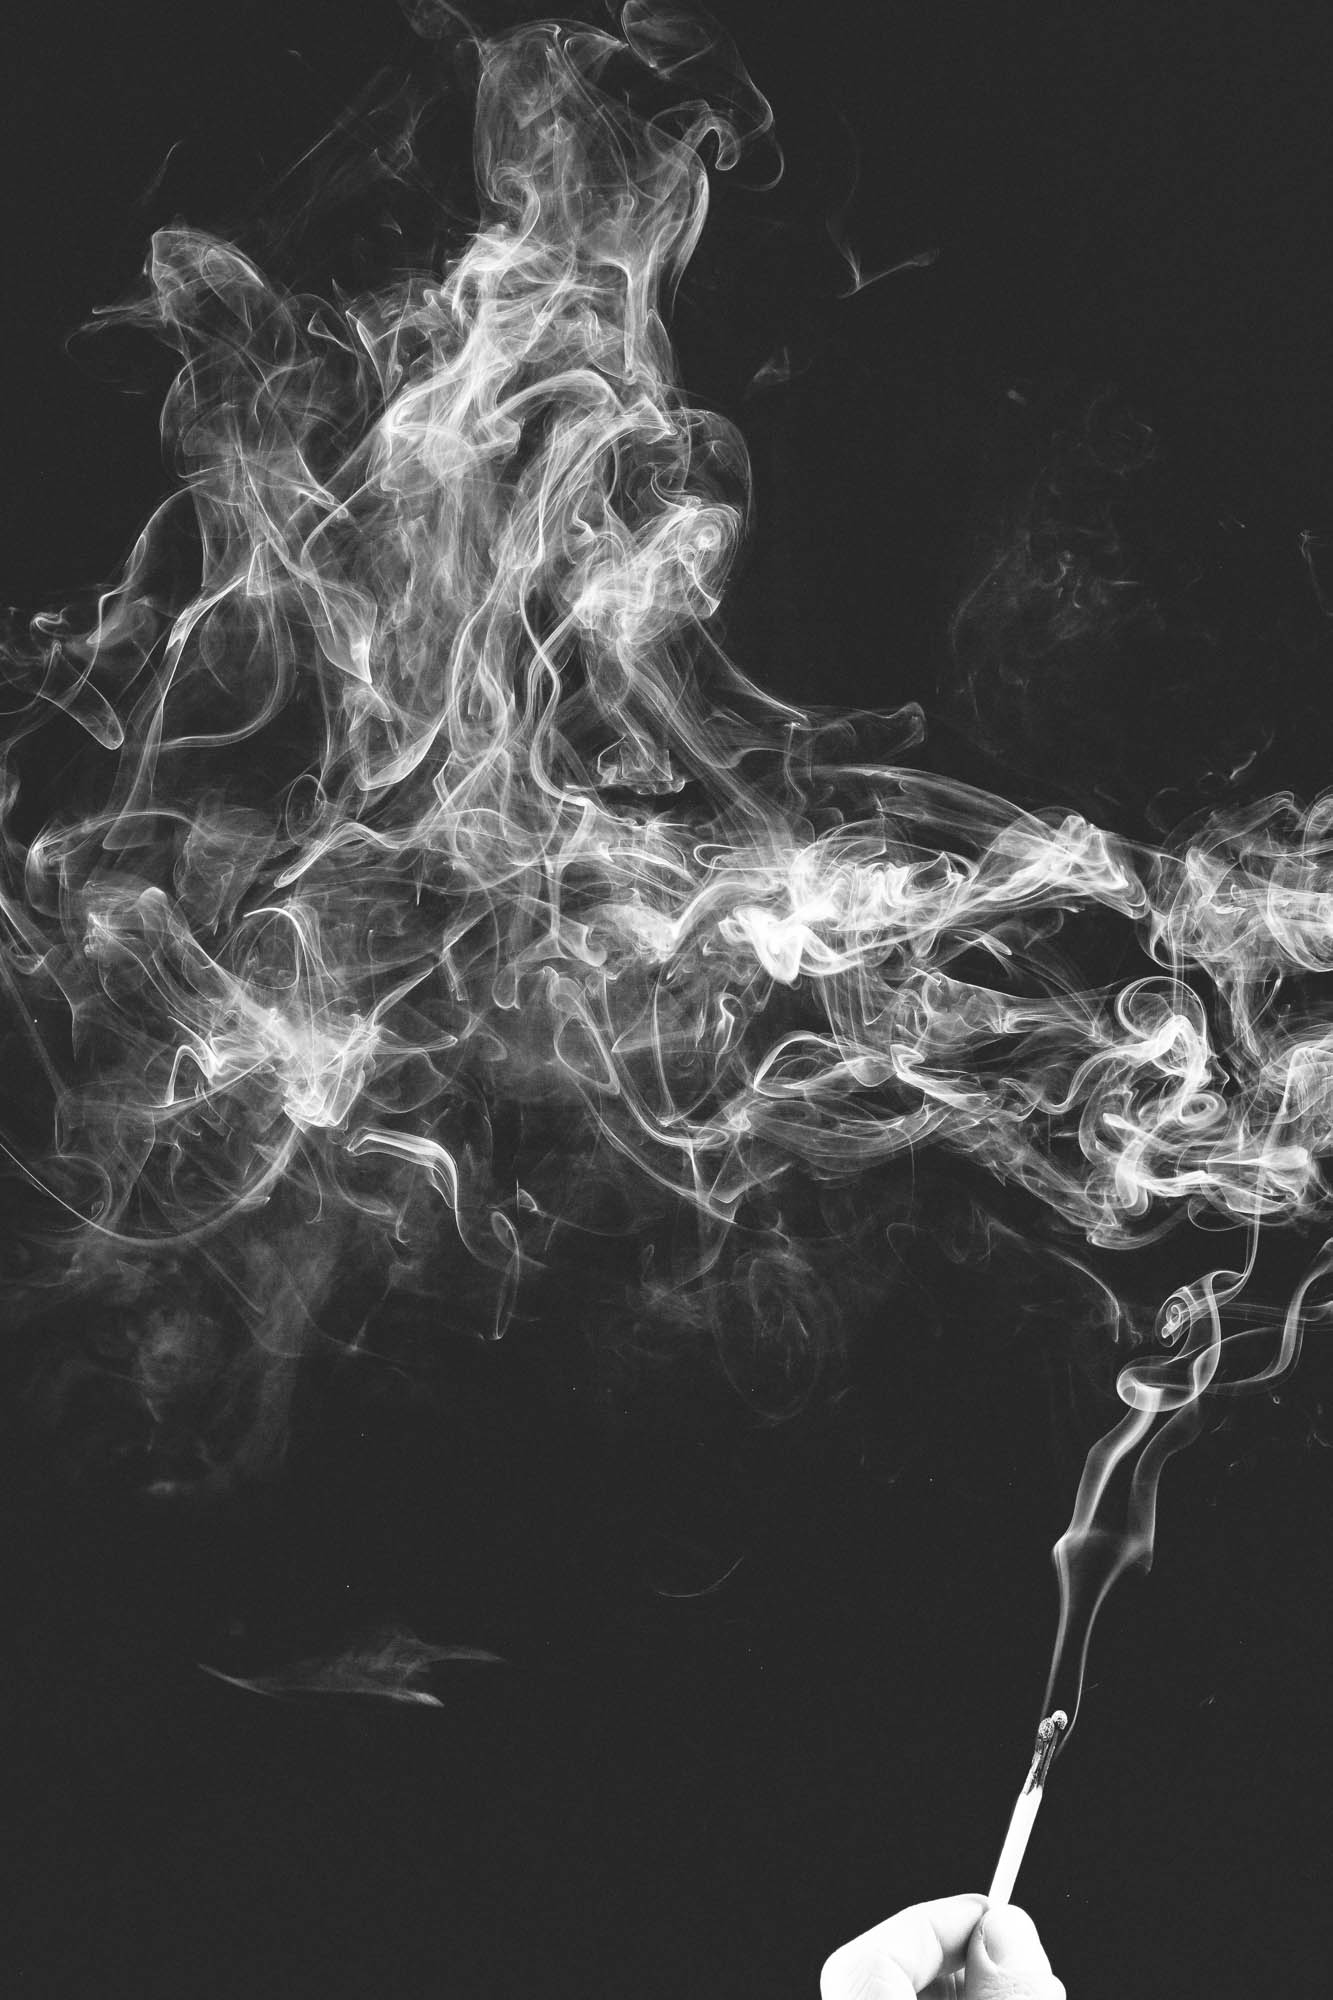
The smoke was captured separately using two strip boxes that were facing each other, about 3 feet apart. I lit wooden matches and gently blew out the flame after they got going, and then captured the resulting smoke. I had almost 100 frames of various smoke patterns that I chose from in post to comp in. The background was black velvet.
SHOOT
I shot with a Canon 5D Mark III and a Canon 100mm 2.8L Macro lens. It was triggered with a handheld remote and tethered to my MacBook Pro.
I shot a myriad of different lighting arrangements and prop arrangements. I experimented with the pepper and lime in various positions. I also had an Out of the Ashes branded beer glass that I poured beer into and perfected the head on. I shot many frames with the bottle spritzed so it looked cold, with and without the foil backlight effect. I had several bottles on hand, two of which I prepped by masking off the paper label and coating it with matte clear acrylic so that when I spritzed it, the label wouldn’t darken and distort with the liquid on it. I have some outtakes at the end of this post so you can see.
I decided in the end to not use the images with the bottle sweating. It didn’t look right to me. I preferred the cleaner, crisp look of the bottle that matched the smoke better. The pepper and lime are in a non-traditional arrangement on purpose and I think it works. I also have a version of this image without the pepper and lime.
POST PROCESSING
This is where the magic happened. The final image was composed of a main hero shot of the bottle and background. A photo with the bottle backlit was comped in, as was a photo where I used the foil to provide some more fill on the front label. I also comped in the pepper and lime from another shot (one with the bottle spritzed that I didn’t want to use). Finally, I comped in an additional piece of wood in very bottom foreground.
The final image is composed of 65 unique layers in Photoshop. I don’t have the finger strength to type out the explanation for every layer, so I’ll give you the quick run down.
Step 1. Comp and mask in all the major portions of the image: Hero, label, backlight, pepper and lime.
Step 2. Use frequency separation technique to retouch 85% of the blemishes, spots, and imperfections. This is the primary method where I cleaned up and smoothed out the glass and highlights.
Step 3. Final spot layer using rubber stamp and clone tool to remove dust near edges and other fine detail that wasn’t ideal to do in Step 2.
Step 4. Retouch out the barcode and other side text on the bottle label. Tone down highlights on the right side of the label.
Step 5. Add board bottom extension, create darkness gradients on the overall board so it blends with the mood better.
Step 6. Tone down the background and adjust the brightness on it so it’s more central to the image, and not biased to camera left.
Step 7. Comp and mask in the smoke in several layers.
Step 8. Liquify the lime to perfect roundness.
Step 9. Apply final tonal adjustments, vignette, add grain.
FINAL BEFORE & AFTER
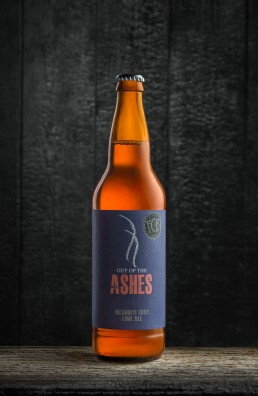
Here is the base hero image (after basic Lightroom adjustments) vs. the basic comp in of the label, backlight, and bottom board:
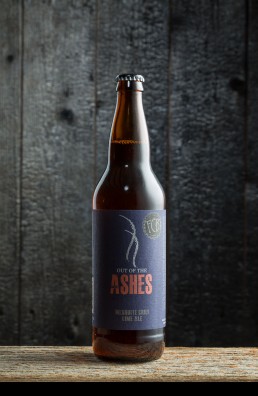
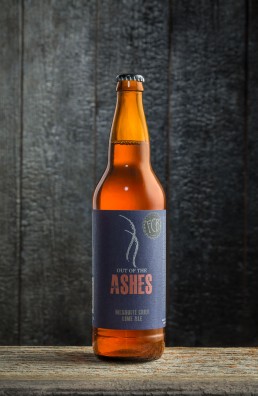
Step 1: This is the base hero image (after basic Lightroom adjustments) vs. the basic retouch composite of the label, backlight, and bottom board.
Step 2: This is the basic comp vs. comp plus all of the spot retouching and most adjustments.
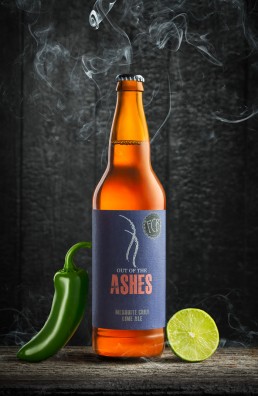
Step 3: This is the adjustments version from Step 3 vs. the final image with the pepper, smoke, and lime retouched in.
Final: Here is the unretouched original photo vs. the final image.